What is Image Optimisation?
Image optimisation is the process of adjusting aspects of the imagery that is used across your website. It helps you achieve the perfect balance between quality and readability for humans and robots alike and is a key part of SEO. Factors such as the file size of your image, the file type (JPEG, GIF, PNG) and even the thumbnails in your site can all have an effect on the load speed of your website, and therefore your SERPs (search engine results pages) rankings. So, what does optimising your imagery entail? Let’s take a look at the best way to optimise images for web.
How to optimise images for web?
Image File Size
Adjusting the size of the image that you’re uploading to your site is a key step in optimising your website’s imagery. Not just in terms of the image dimensions, but also when it comes to image file size. There are many ways to change the file size of an image, Photoshop is, without doubt, a crowd favourite for all photo editing needs. However, Photoshop is expensive and there are many free alternatives, such as:
Kraken.io
TinyPNG / TinyJPG
Compressor.io
GIMP (a free alternative to Photoshop)
Additionally, though Photoshop’s “Save For Web” feature will help to compress the file size using a file compressor site can also shave off further KB, so there’s no harm in going directly to the image compressor sites.
One thing to keep in mind – the larger your imagery, the longer it’ll take to render. If your image’s dimensions are too large, this can slow down the load time of your website which can be detrimental to your site’s ranking on the SERPs. The good news is, changing the size of your imagery is easier than ever. If your website is created on WordPress, you’re able to scale the image inside the platform, or alternatively there are plenty of image re-sizing websites out there that can help you. But ultimately the most flexible way of resizing and cropping imagery is to use a programme like Photoshop or a free alternative such a GIMP.
Alt Attributes
Alt attributes, (a.k.a alt text or alt tags) are the text that displays when a site cannot render the imagery. They’re used by SERPs to determine the nature of the image that’s being displayed. Editing the alt attribute in your CMS to be relevant to the image being shown helps visually impaired users understand what each picture is showing.
It also adds value to your SEO, as crawlers will crawl the alt text of images, which means they are a useful place to put in target keywords where applicable. Additionally, maintaining relevant alt attributes is an excellent way of getting product images onto image results too! It’s also worth bearing in mind that if your products have varying serial numbers or product codes/variations (e.g. FAB28LYW3UK), adding these to your alt attribute will help to rank the image to that product code.
However, there are some things to bear in mind with optimising your alt attributes. Whilst they should be relevant to the keyword that you’re targeting with the image (i.e. SMEG Fridge), it’s important not to fall victim to keyword stuffing in any part of your website, including your images. Secondly, don’t go crazy with the alt attributing. Not only could you be penalised by search engines for over optimisation, you could also end up getting the wrong image ranking for the targeted keywords i.e. a thumbnail over the display image. (See thumbnail optimisation)
Appropriate and Relevant File Names
Not only do crawlers like Google’s bots look at the alt attribute of an image, they also look at the given file name of the image. When a picture is taken on a digital camera, the camera auto-assigns it a name – usually something along the lines of DCIM003. DCIM003 does not tell search engines what the image is. Instead of leaving the file name as it is, look at the image that you’re uploading – if you were a user, what search terms would you use to find that image? I.e. Yellow Smeg Fridge / Smeg Fridge etc. Try to incorporate these words into the file names for key imagery across your website.
A good way to think about this is to pretend you’re Google for a second. If you were Google and you stumbled upon an image called “DCIM003.jpg”, how are you supposed to know what that image is of? However, if you stumble upon an image called “Yellow_Smeg_FAB28LYW3UK_Fridge.jpg”, you can pretty safely assume that inside that picture is a yellow Smeg fridge. Appropriately naming your image files is a crucial step in image optimisation.
Select the proper file type
When it comes to image optimisation, there are three primary image types: JPG (or JPEG), PNG and GIF. Choosing which file type to save your image as isn’t just a matter of point and shoot. It’s important to understand the differences between each file type and the most appropriate instances in which to use each one.
JPEGs
- Colour Palette: 16,000,000
- Supported Colour Space: RBG
- Loss: Lossy
- Primary Use: High quality imagery
JPEGs are by far the most popular of the three image file types, and for good reason. As we all know, websites are the new shop window. Whether you’re looking for a new T-shirt, smartphone, or an avocado slicer, chances are you’ll go online to window shop. When displaying your products for the world to see, you want the colours to be as vibrant and true-to-life as possible. Each file type has a limited colour pallet, however JPEGs has the largest by far whilst maintaining a small enough file size to be appropriate for web usage. This means when you’re displaying your product on your website, you can maintain a good page load speed, as well as high image quality.
The main drawbacks of JPEGs are the lossy status that they hold, and the incapability of transparency. When zooming in on a JPEG, areas of an image can become blurred and blocky. If you’re looking to use a “zoom” capability on a website, we’d recommend providing a link to view the image in a bigger format so that your website isn’t having to render and load a large image from the get-go. With regards to transparency, JPEGs are unable to support transparent formats. If you’re looking to place a coloured, transparent overlay to an image, a PNG will support the transparency whereas a JPEG wouldn’t.
GIFs
- Colour Palette: 256
- Supported Colour Space: RGB
- Loss: Lossless
- Primary Use: Buttons, blocks of colour, silly reactions
GIFs are a lossless image format with a limited colour palette which makes them far from ideal for uploading digital photography, but ideal for buttons and blocks of colour. You may be more familiar with the term GIF in relation to sending your friends funny GIFs of short image/video hybrids from Friends episodes. However, a GIF can also be a stationary, solid image. They’re rarely used throughout web design as the lossless benefit of a GIF is not worth the sacrifice of the extremely limited colour palette. If a lossless image is required, a PNG will be used in place of this due to the superior colour palette available.
PNGs
- Colour Palette: 16,000,000
- Supported Colour Space: RGB/RGBA
- Loss: Lossless
- Primary Use: Transparent overlays
PNGs were developed years after the GIF and JPEG format, and they aim to bring together the best of both worlds. They’re lossless, have a 16,000,000 wide colour palette and support transparency. So why aren’t we using them over and above the humble JPEG? The simple answer being that PNGs come at a cost – file size. As mentioned above, a large file size means longer loading times at a detriment to your SERPs rankings. Adobe Photoshop (or some of the free alternatives listed below) enables you to save PNGs as two different file sizes:
PNG-8
256 colour palette | smaller file size | will not provide the same image quality as a JPEG
PNG-24
16,000,000 colour palette | larger file size | increases page load time if used too regularly. I.e. instead of a JPEG
That doesn’t mean that they don’t still have their place on your website, though. Finding the balance between using an appropriate number of larger file sizes that support your beautiful web design (transparent overlays), and maintaining functionality, is the key to maintaining a stunning website and your SERPs rankings.
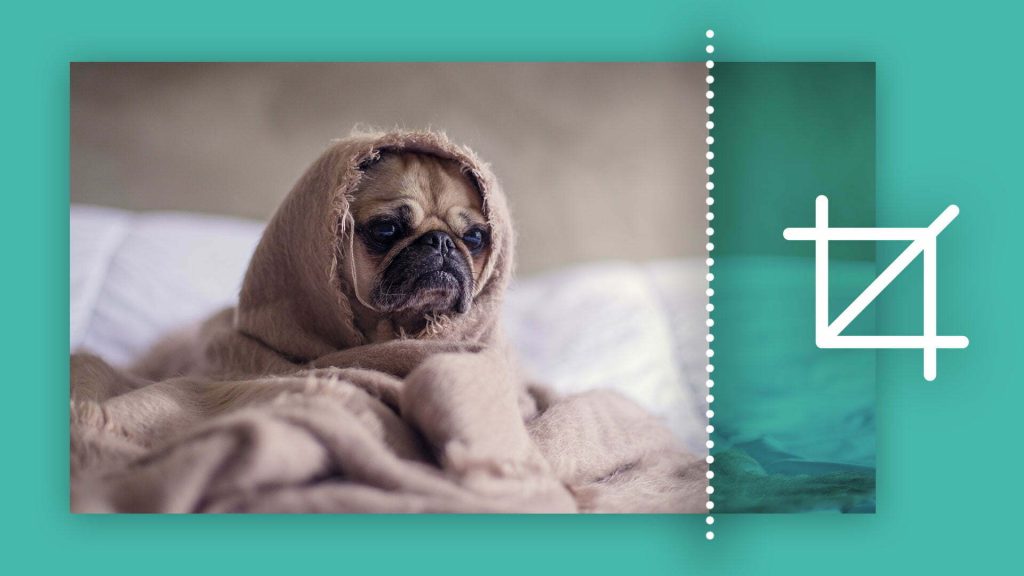
Optimise Thumbnails
No, I’m not talking about getting a manicure (though I might need to after all this typing…). Thumbnails are those small images that are a sample of the content that you’re about to click on. For example, when watching videos on YouTube, the pictures in the sidebar that accompany the links to other similar videos are thumbnails. These are regularly overlooked in an image optimisation to-do list. But these guys are a wolf in sheep’s clothing when it comes to your website.
So, how do you optimise your thumbnails? Well, you won’t hear us say this often, but thumbnails are one area in which you can let aesthetic quality take a back seat in favour of functionality. “They’re only a small image though?”. True. However, you’re likely to have many thumbnails across a page and those will all add up and start to put some strain on your load speed.
Don’t hate us, but we’re going against everything we’ve just said again. Make sure that you assign your thumbnails entirely different alt text to the larger, higher quality image that you actually want to rank in SERPs image results. For example, if a user searches for an item that you’re selling, and the image that’s ranked in the images banner at the top of the SERPs is a low-quality thumbnail image then it won’t be showing your product in all its shining glory.
Don’t put headers in images
A lot of web design is an illusion. Take our homepage as an example. Although the image across Yellowball’s website looks as though the words “Multi-Award Winning Search Engine Optimisation” are inside the image, they’re actually layered on top of it. If you were to go to the Yellowball website, you’d be able to highlight the text as if it were normal body copy.
So why is this important? Well, inside your website, the headers sit inside header tags (<h1>) and body copy sits inside paragraph tags (<p>). When search engine bots crawl your website to determine what a page is about,, they look for header tags to signpost its relevance and value to specific search terms. If your webpage’s header is inside an image, instead of laid over it with <h1> tags, then crawlers can’t identify the header/title of the content. One of the main objectives of SEO is to make your website readable for both humans and robots alike. By placing the header inside an image you’re making your website readable to humans, but not robots. If the robots can’t read it, then your website simply won’t rank as well as sites that they can read.
Hints, Tips and FAQs
Of course, there are some general good practices when it comes to image optimisation:
Images should be relevant and add value to the page
Ensure that the placement of the image is appropriate and thought out in terms of user flow and experience on the page – is a large image placed halfway down your blog making users assume that the blog has finished?
Choose your image dimensions and angles carefully to best display your product and its key features – a picture can say a thousand words, so make sure it’s saying nice things.
What’s the difference between image size and image weight?
Image size refers to the physical size of the image i.e. 300 x 600px. The image weight refers to the size of the file. For example, you could have three versions of the exact same image with the same image size, but a JPEG would have a smaller weight than a PNG. This is all to do with the differences in image file sizes between JPEG, GIF and PNG as mentioned above.
What are other free alternatives to Photoshop for image sizing?
At Yellowball, we recommend these guys:
https://compressor.io
https://kraken.io
https://www.jpeg.io/
However, your CMS (e.g. WordPress, Shopfify) may have a free built-in feature for this.
What do lossy and lossless mean?
A: Lossless refers to the way in which imagery can be compressed or decompressed to its original size, and maintain its quality. Lossy compression removes data entirely from an image, so the quality can reduce and if the image is decompressed to its original size, the original quality will be lost.
There are plenty of SEO agencies who dabble in web design. And there’s a fair share of web design agencies that will do basic SEO. Here at Yellowball, we blend the two, without compromising on the quality. Our team is made up of expert SEOs and website designers who work together to create bespoke designed websites which are SEO optimised from day one. Other companies may get along doing one side half-heartedly, but that’s not our style.